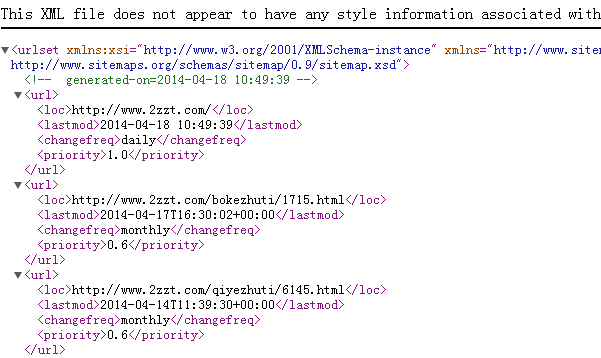
首先,我还是承认了吧,教程是从奶嘴那弄来的,为的也是方便自己,顺带方便下浏览用户们!今天介绍的就是不使用插件完成wordpress代码实现网站地图sitemap的html和xml的方法,本站以前一直用着柳城的百度地图插件,今天心血来潮,想着还是直接代码吧,少用插件的好!
下面我就直接说教程吧,当然现在开始你就可以卸掉了wordpress百度地图的插件了!

首先我先提供下sitemap.php的文件吧:传送门 将文件下载下来,上传到当前wordpress主题文件夹的根目录,然后新建页面,选择站点地图模板即可!这样一个html的站点地图就OK了。
然后我说下xml站点地图的实现方法吧
在空间wordpress的根目录下创建xmlmap.php文件,内容为下面内容
- <?php
- require('./wp-blog-header.php');
- header("Content-type: text/xml");
- header('HTTP/1.1 200 OK');
- $posts_to_show = 1000;
- echo '<?xml version="1.0" encoding="UTF-8"?>';
- echo '<urlset xmlns:xsi="http://www.w3.org/2001/XMLSchema-instance" xmlns="http://www.sitemaps.org/schemas/sitemap/0.9"
- xsi:schemaLocation="http://www.sitemaps.org/schemas/sitemap/0.9 http://www.sitemaps.org/schemas/sitemap/0.9/sitemap.xsd">';
- ?>
- <!-- generated-on=<?php echo get_lastpostdate('blog'); ?>-->
- <url>
- <loc>http:
- <lastmod><?php echo get_lastpostdate('blog'); ?></lastmod>
- <changefreq>daily</changefreq>
- <priority>1.0</priority>
- </url>
- <?php
- header("Content-type: text/xml");
- $myposts = get_posts( "numberposts=" . $posts_to_show );
- foreach( $myposts as $post ) { ?>
- <url>
- <loc><?php the_permalink(); ?></loc>
- <lastmod><?php the_time('c') ?></lastmod>
- <changefreq>monthly</changefreq>
- <priority>0.6</priority>
- </url>
- <?php }
- </urlset>
上传到根目录后,就是设置url转发规则了,目的是让https://www.2zzt.com/sitemap.xml能够被访问,当然这个sitemap.xml内容就是xmlmap.php的
根据不同的服务器环境来设置url转发规则!
首先是apache下的规则:
- RewriteEngine On
- RewriteBase /
- RewriteRule ^sitemap.xml$ xmlmap.php
将以上代码加入到.htaccess文件即可,接下来是nginx下规则:
- rewrite ^/sitemap.xml$ /xmlmap.php;
现在,wordpress的xml站点地图也OK了,这样就可以剩下一款插件了!
